You can create an email account on your iOS in two ways - manually and automatically. In this guide, we'll show you both.
Automatic adjustment
- Click on "Settings"
- Click on "Mail"
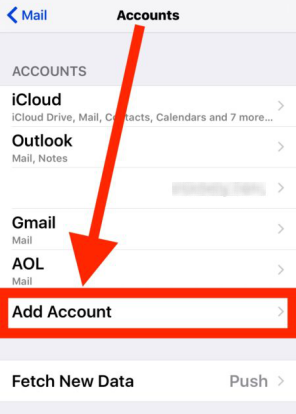
- Click on "Accounts"

- Click on "Add Account"
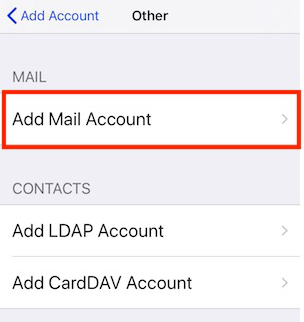
- Click on "Other"
- Click on "Add Mail Account"
- In the "Name" field, enter the name that will be used for the e-mail account
- Enter your email address in the "Email" field
- In the "Password" field, enter the password of your e-mail account
- In the "Description" field, enter a description of the e-mail account
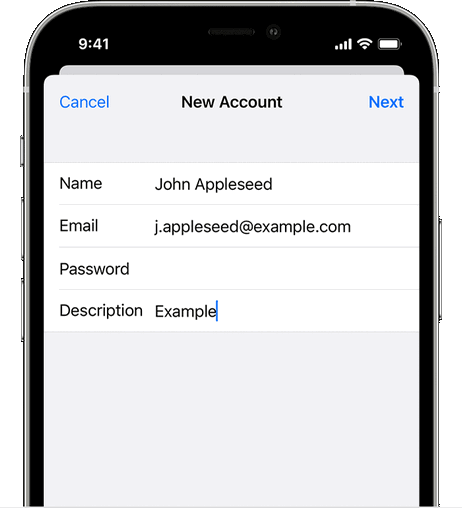
- Click on "Next"
- The email application will try to automatically find your settings and create your email account
- Click on "Done"
Manual adjustment
If the mail application cannot create an account, you will have to create it manually:
- Click on "Next"
- Select "IMAP" or "POP"
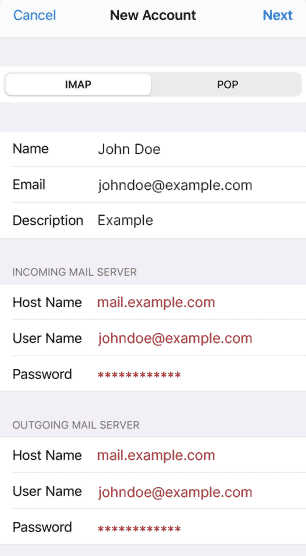
- In the "INCOMING MAIL SERVER" section, in the "Host Name" field, enter mail.example.com (replace example.com with your domain name)
- In the "User Name" field, enter your full e-mail address, e.g. johndoe@example.com
- Enter your e-mail password in the "Password" field
- In the "OUTGOING MAIL SERVER" section, in the "Host Name" field, enter mail.example.com (replace example.com with your domain name)
- In the "User Name" field, enter your full e-mail address, e.g. johndoe@example.com
- Enter your e-mail password in the "Password" field
- Click on "Next"
- If your information is correct, click "Save"
